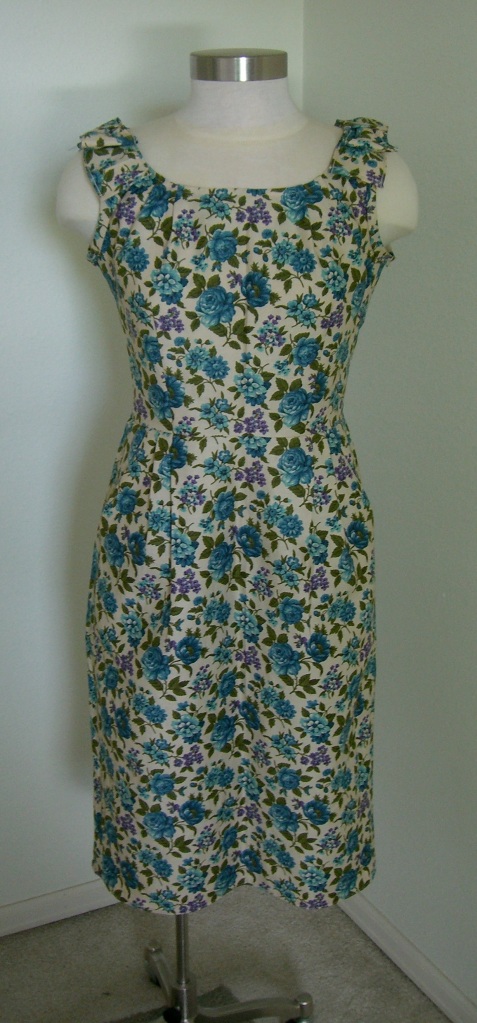
Bonus dress edition!
When my friend Alison started this whole “Let’s plan a weekend to get together and sew from vintage patterns” idea, I already had a stash of patterns from which to choose, and some vintage curtains that I’d deconstructed into panels of fabric. I was ready to go!
I was ready to go, that is, until I discovered that the vintage pattern I’d chosen was missing pieces. Important pieces. As in, all of them. All I have for Simplicity 3282 is the sleeve, cummerbund, and skirt pattern for View 2. A lovely dress that I still hope to make one day, when I draft a replacement bodice, but I had NO pieces for View 1, which I’d intended to sew. I scrambled to put Plan B into action, and as yesterday’s post attests, it went off well. But here were are at Sunday, and my sewing buddies who chose fully-lined patterns and troublesome fabrics are still at it. Sooooooo… enter Plan C. As I mentioned in Part Two, I had already found a modern pattern, McCall’s M5686, which was similarish to the vintage Simplicity 3282. So, what the heck? I have the time, and the fabric. Let’s do it!
I’ve never sewn McCall’s before, so I check my measurements against the pattern size chart, and am shocked (SHOCKED!) to come up as a 6. Really? I double check. Yep, those are the measurements. Well, alrighty then. I cut out the pattern, minus the sleeves which I am leaving off as I try to emulate the vintage pattern. I add two inches to the skirt length, for the same reason. I cut out the fabric. I mark the pieces, all of which have pleats all over the dang place and require lots of marking, to be followed by lots of folding-ironing-basting. I finally start sewing. When the bodice is together, I do a test fit… and it’s too small.
Too small!
Alison grabs the pattern envelope, and finds ANOTHER size chart, this one on the envelope FLAP, which puts me at a 12. Well, that’s just a little different, now isn’t it? ISN’T IT? Yikes! I have excess fabric, but not enough to cut out the whole dress again. And ugh, those pleats. It takes me about 12 seconds to decide that I’ll open up the side seams, and add fabric panels. Which means I have to do math. Oy! Okay, let’s see… 5/8-inch seam allowance, times eight by the time I’m done adding TWO panels, and the zipper still needs to go in, so let’s see. X times Z, carry the Y, drink a glass of wine, divide by N, and what do we have? Okay, I shall cut two 3-inch panels and slip them into the side seams of the bodice, which should add 3.5 inches to the finished circumference. And then the same for the skirt. Done and done, new fitting, crisis averted. Whew! Hmmm, that two inches that I added to the skirt length is no longer as much excess as I’d thought. The skirt will now become a rolled hem, to maximize length.
Okay, so now all I need to do is finish the arm holes where I left off the sleeves and… hey. Don’t these look a lot narrower than they do on the pattern envelope? They look a lot narrower. I don’t really want them to be narrower. And I don’t want sleeves, even cap sleeves. Hmmm. Alison suggests finishing them with bias tape. Hey, that’s a good idea! I’m not thrilled with the idea of my dress potentially looking like a ringer tee, but better that than sleeves. I make a quick run to JoAnn.
JoAnn closes 15 minutes before I get there. I really want to finish this up while I still have momentum, so I decide that I will make my own bias tape. Self fabric is the way to go! Yay!
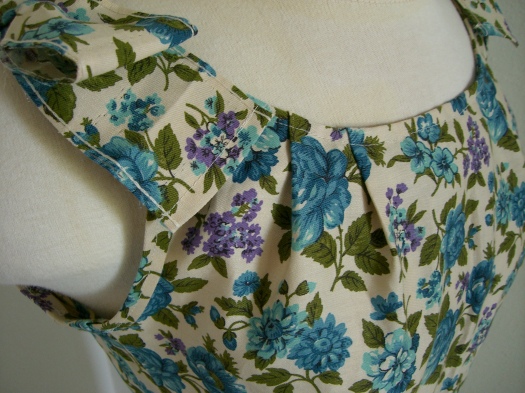
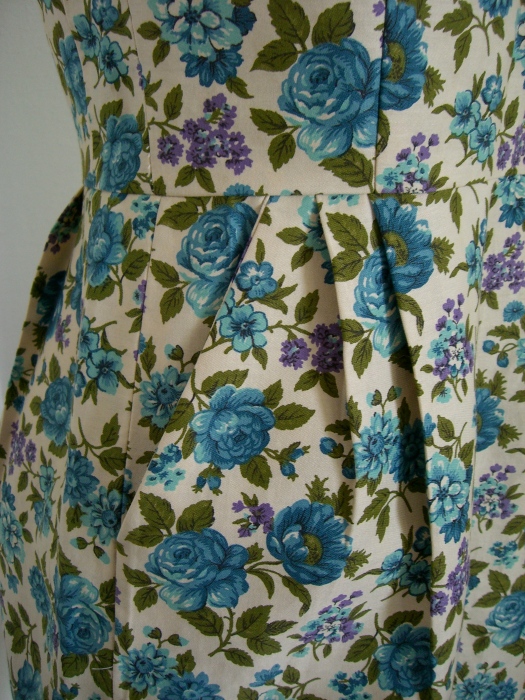
Okay, now, um, how do I do that? I sit down with the 1949 edition of The Complete Book of Sewing (an early birthday gift from Alison; if you’re going to sew vintage, you may as well have vintage sewing reference) and look it up, to discover that it’s exactly how I pictured it as I drove back from JoAnn. Cut cut cut, iron iron iron iron iron iron IRON IRON IRON and finally, ready to sew. I sew the new bias tape, I add bows at the shoulders, and voila, I have a dress, with POCKETS:


SOOOO wonderful!
LikeLike
gorgeous fabric! where did you get it from?
LikeLike
What a lovely dress! You would never know you had any trouble at all with it. 😉 I used to make a lot of aprons and made a LOT of self-fabric and contrasting fabric bias tape. You’re right—lots of ironing. But honestly, I think self-fabric bias tape looks better than store bought most of the time! 😀
LikeLike
What a lovely dress!!! You would never know you had trouble with it at all. I love the fabric you used.
Bias tape is always “fun” to make, isn’t it? I have always thought, though, that self-fabric bias binding on neck edges and sleeves looks much better that store bought binding. 😀 GREAT JOB!!!
LikeLike
It’s just gorgeous, the style and the fabric really is fantastic! I’ll be dropping by again, can’t wait to see more of your creations!
LikeLike
Have a spool of the same design from 1980 except its pink flowers on a cream setting..wondering if you know any kind of market for it ive been trying to get rid of the thing..email me back
LikeLike